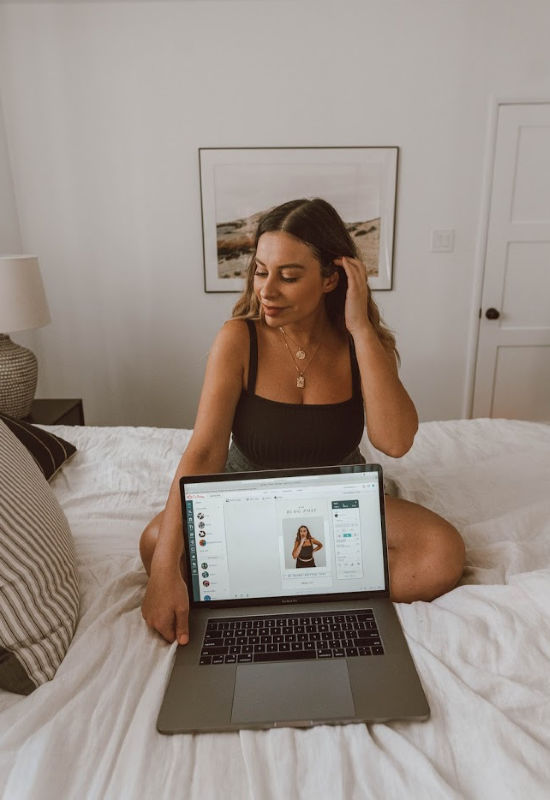
You guys know how much I enjoy editing photos. It’s honestly so therapeutic for me and puts me in the BEST mood. When I first started blogging (mmmm some 8 years ago!) I discovered PicMonkey, an online website that allows you to add filters, edit lighting and even touch up those pesky blemishes…I was blown away at the time because I knew NOTHING about editing. PicMonkey was my first foray into editing and continues to be my secret editing tool! Yup, I use it on all my final Instagram posts and particularly love using it to make my blog content pop!
Let’s get into all the ways you can use PicMonkey:
GRAPHICS
I have always struggled a bit with graphics because…well, I’m not a graphic artist. But as a blogger its’ important for me to use in them my photos and website content. PicMonkey’s graphic library is a LIFESAVER. They have a ton of categories to browse through but for us bloggers the important ones are:
-Social Media: to add Facebook, Pinterest and Instagram Icons to any photo or email blast.
-Design: this came out recently and it’s a bloggers dream graphic…BRUSHSTROKE. I love using the brushstroke graphic for blog collages and images.
-Basic: need a line, an arrow? How about some stars? The basic graphic category has all that! I love using it for Instagram stories!
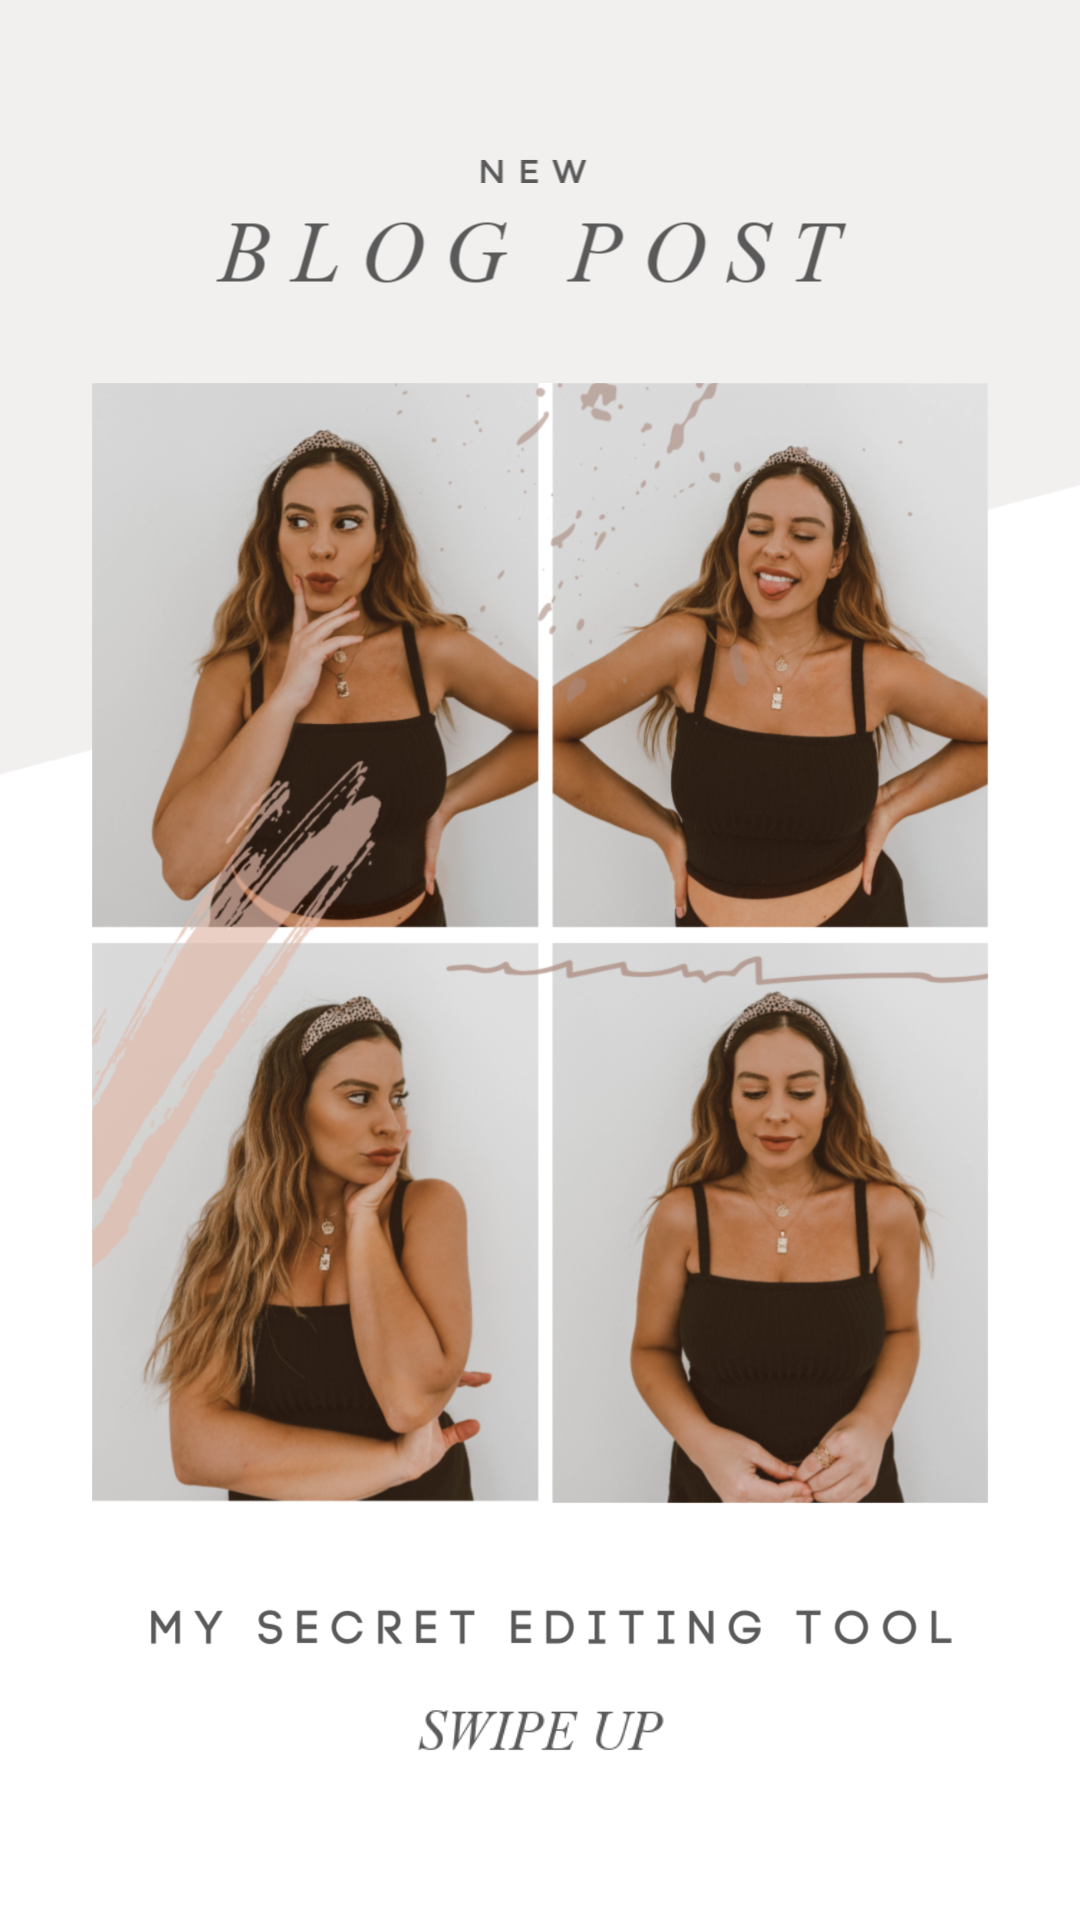
TEMPLATES
When PicMonkey launched with Templates this year…I shed a tear. While I appreciate a good layout I am horrible at creating one! Their templates are pre-made designs that you can use for Instagram Stories, Pinterest Pins and more.
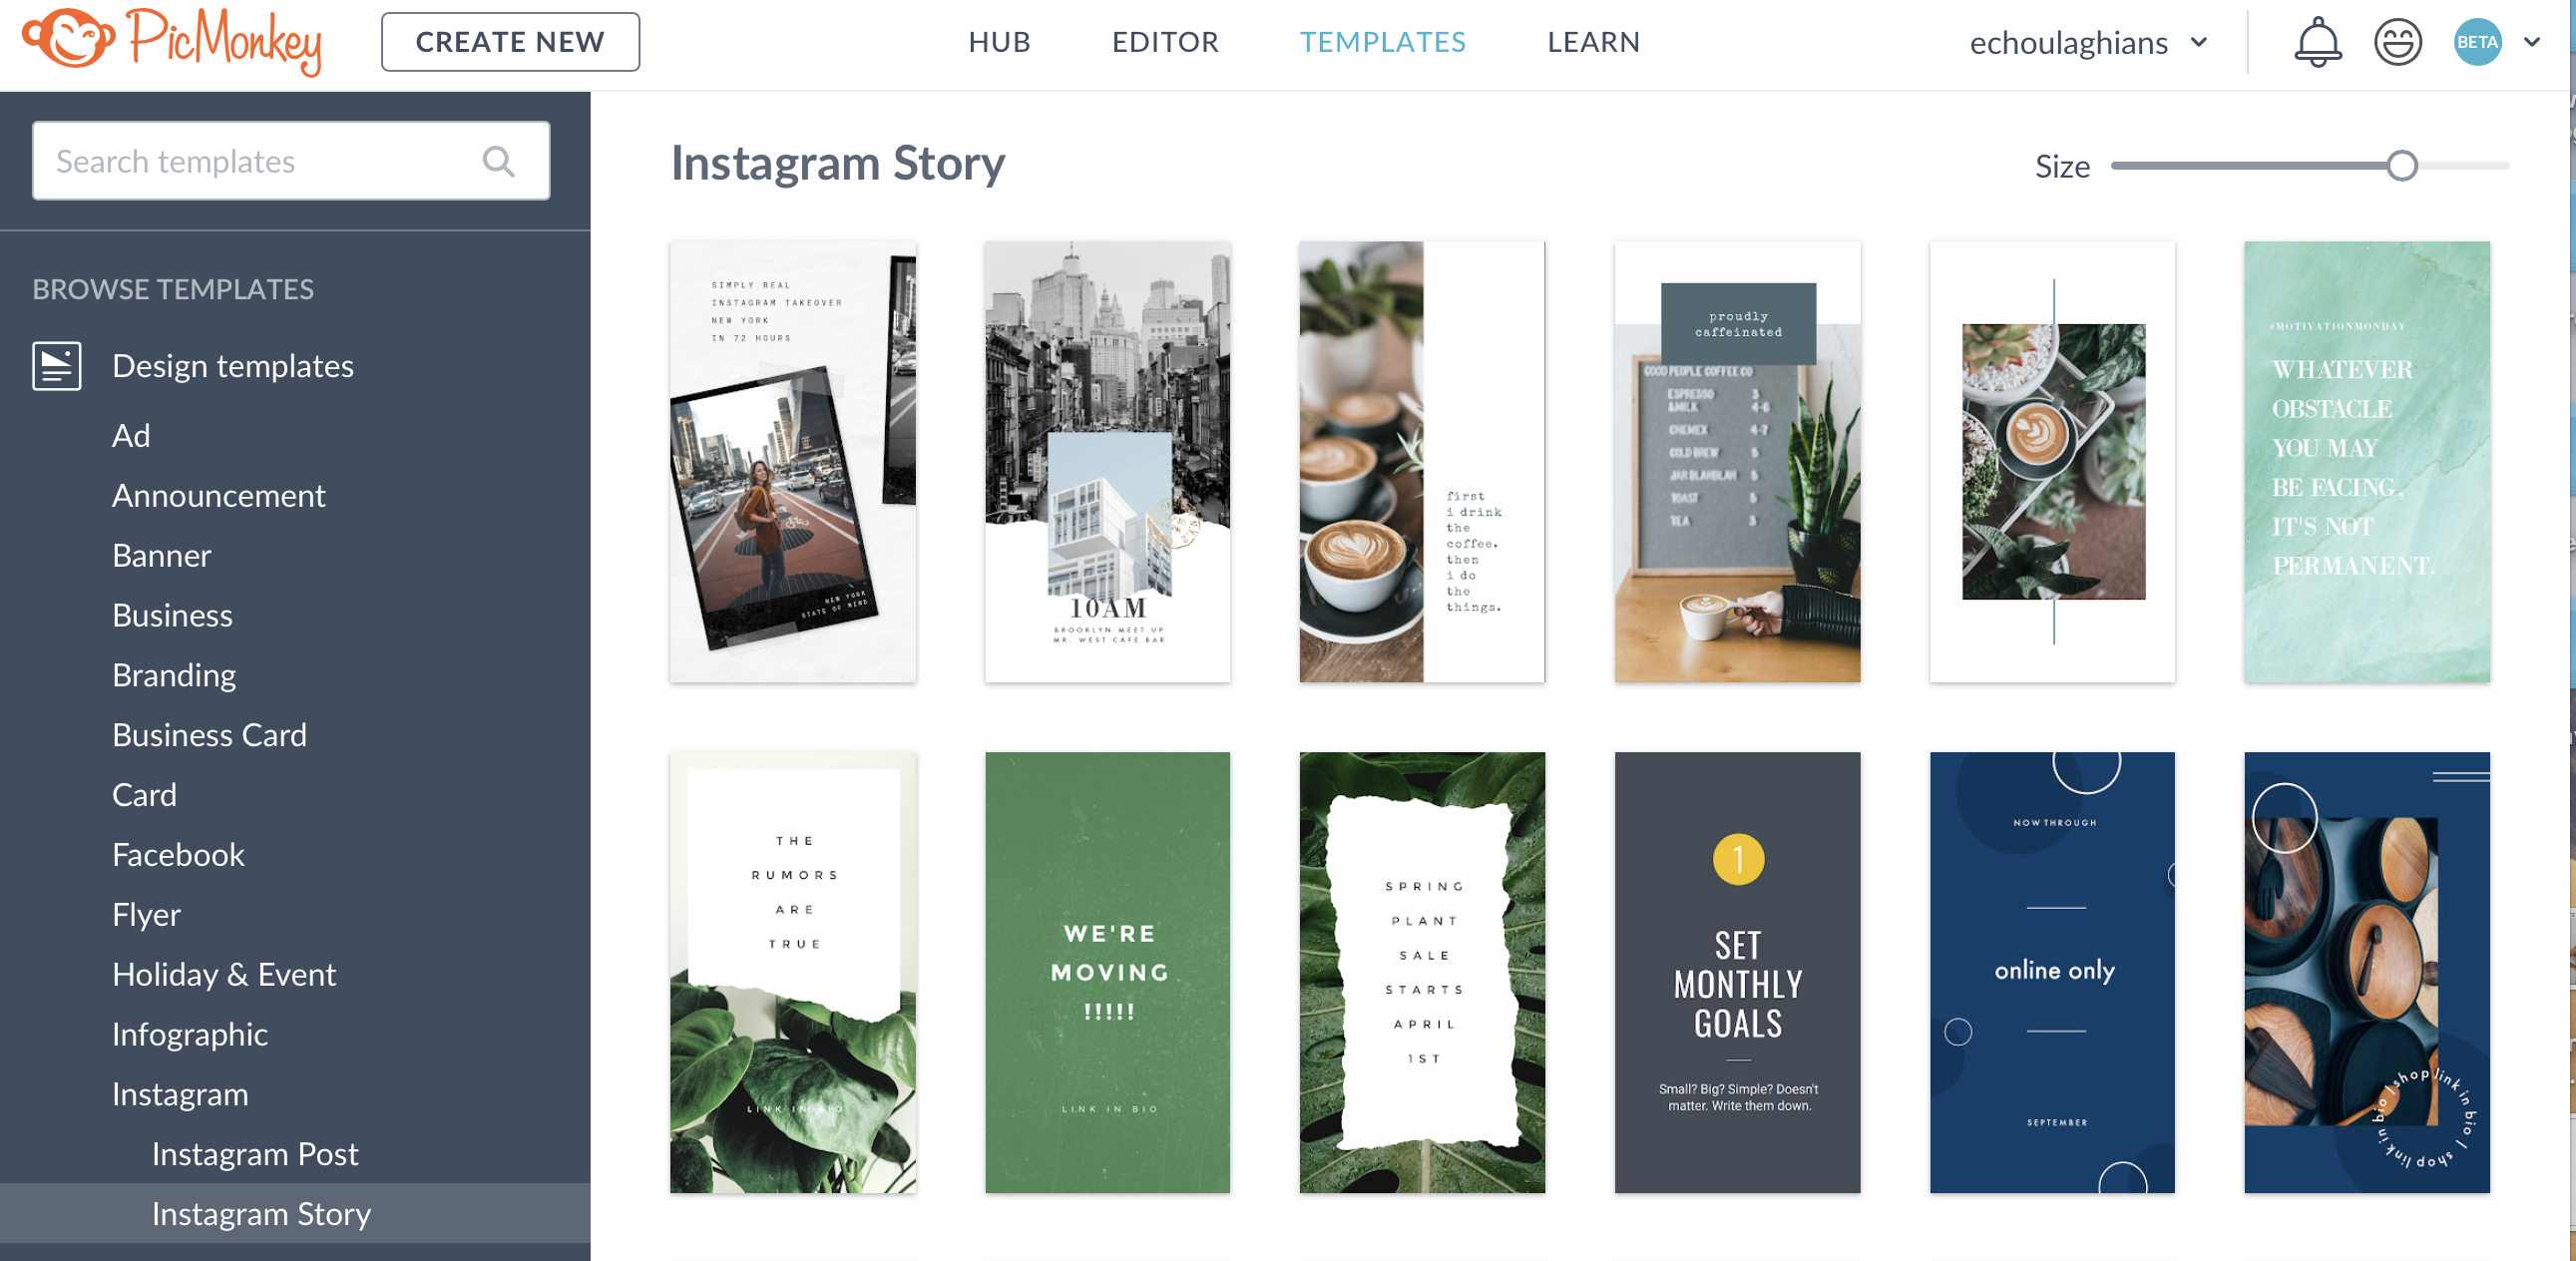
-Instagram: I love their Instagram templates and use one in particularly for all my Instagram Story Blog Updates. You guys have probably seen it a ton by now! All I did was open the PicMonkey template, add my own photo, delete the photo that was a place holder and edit the text!
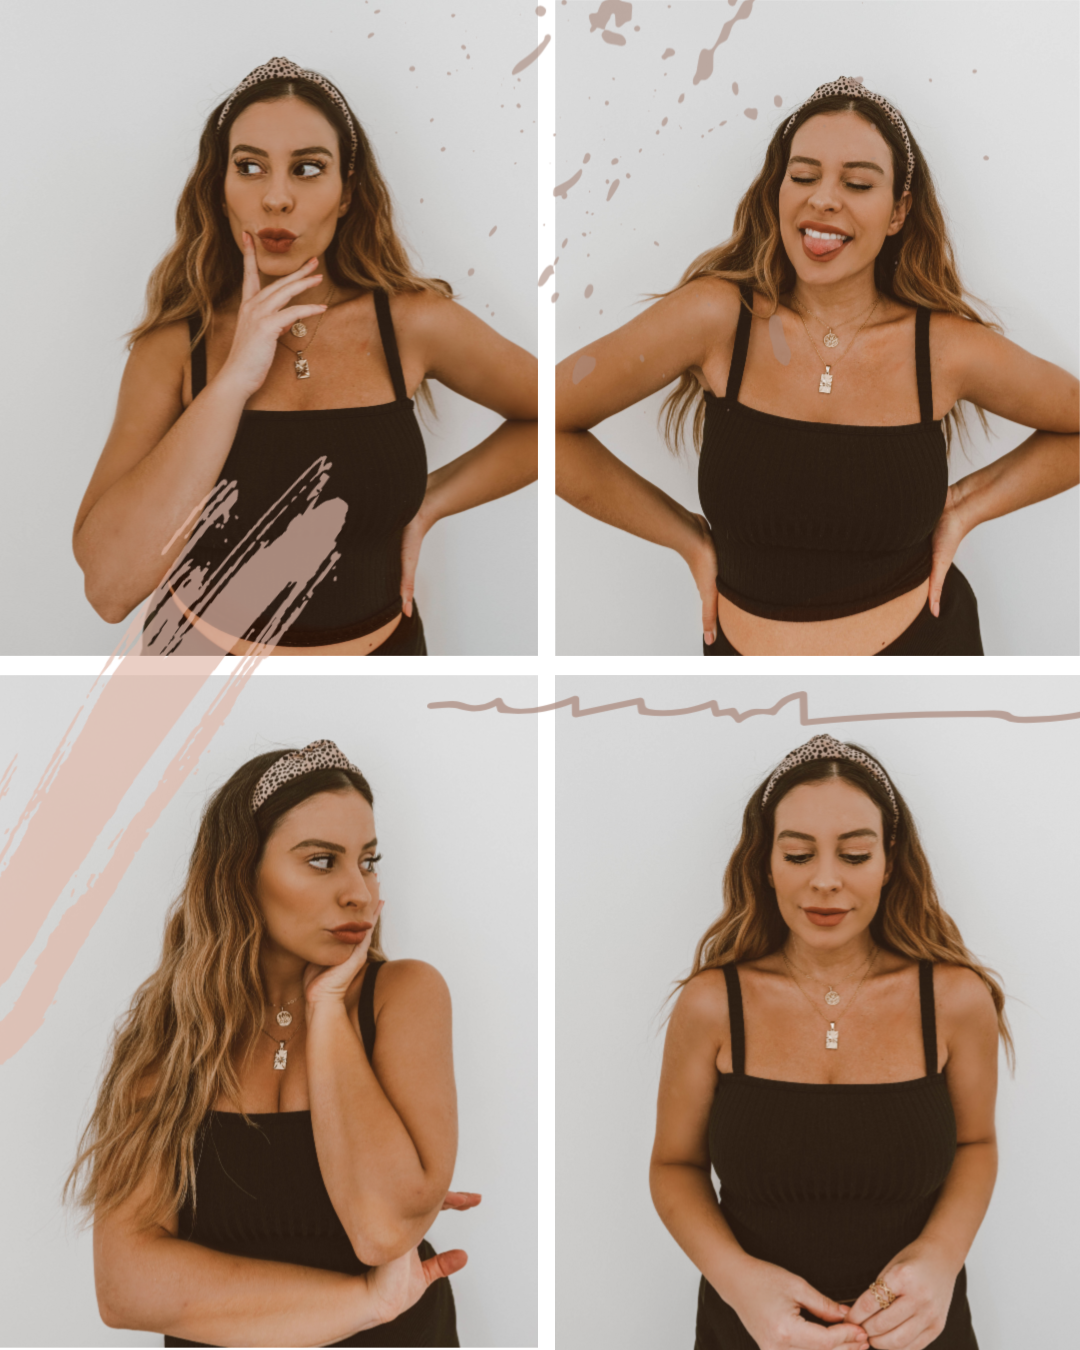
TOUCH UP
When you first upload a photo to PicMonkey you’ll see a Touch Up icon on the left-hand corner. It’ll take you to a sub-list of touch ups you can apply. I use:
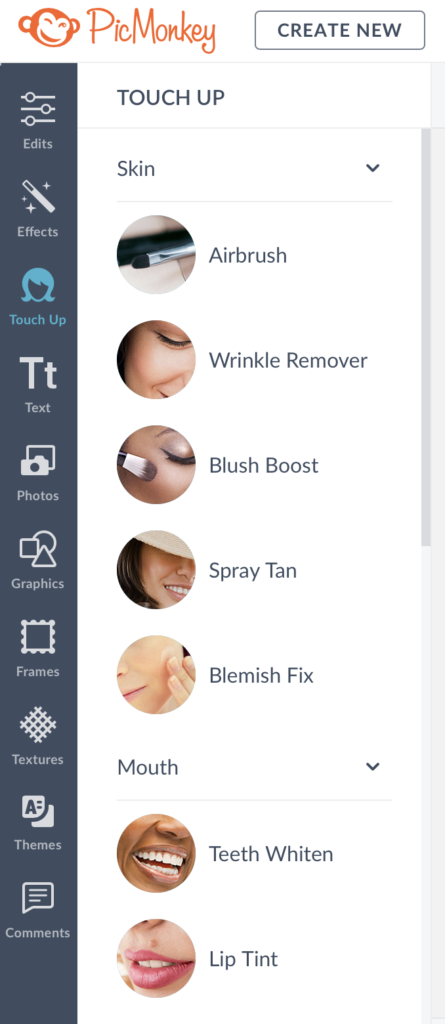
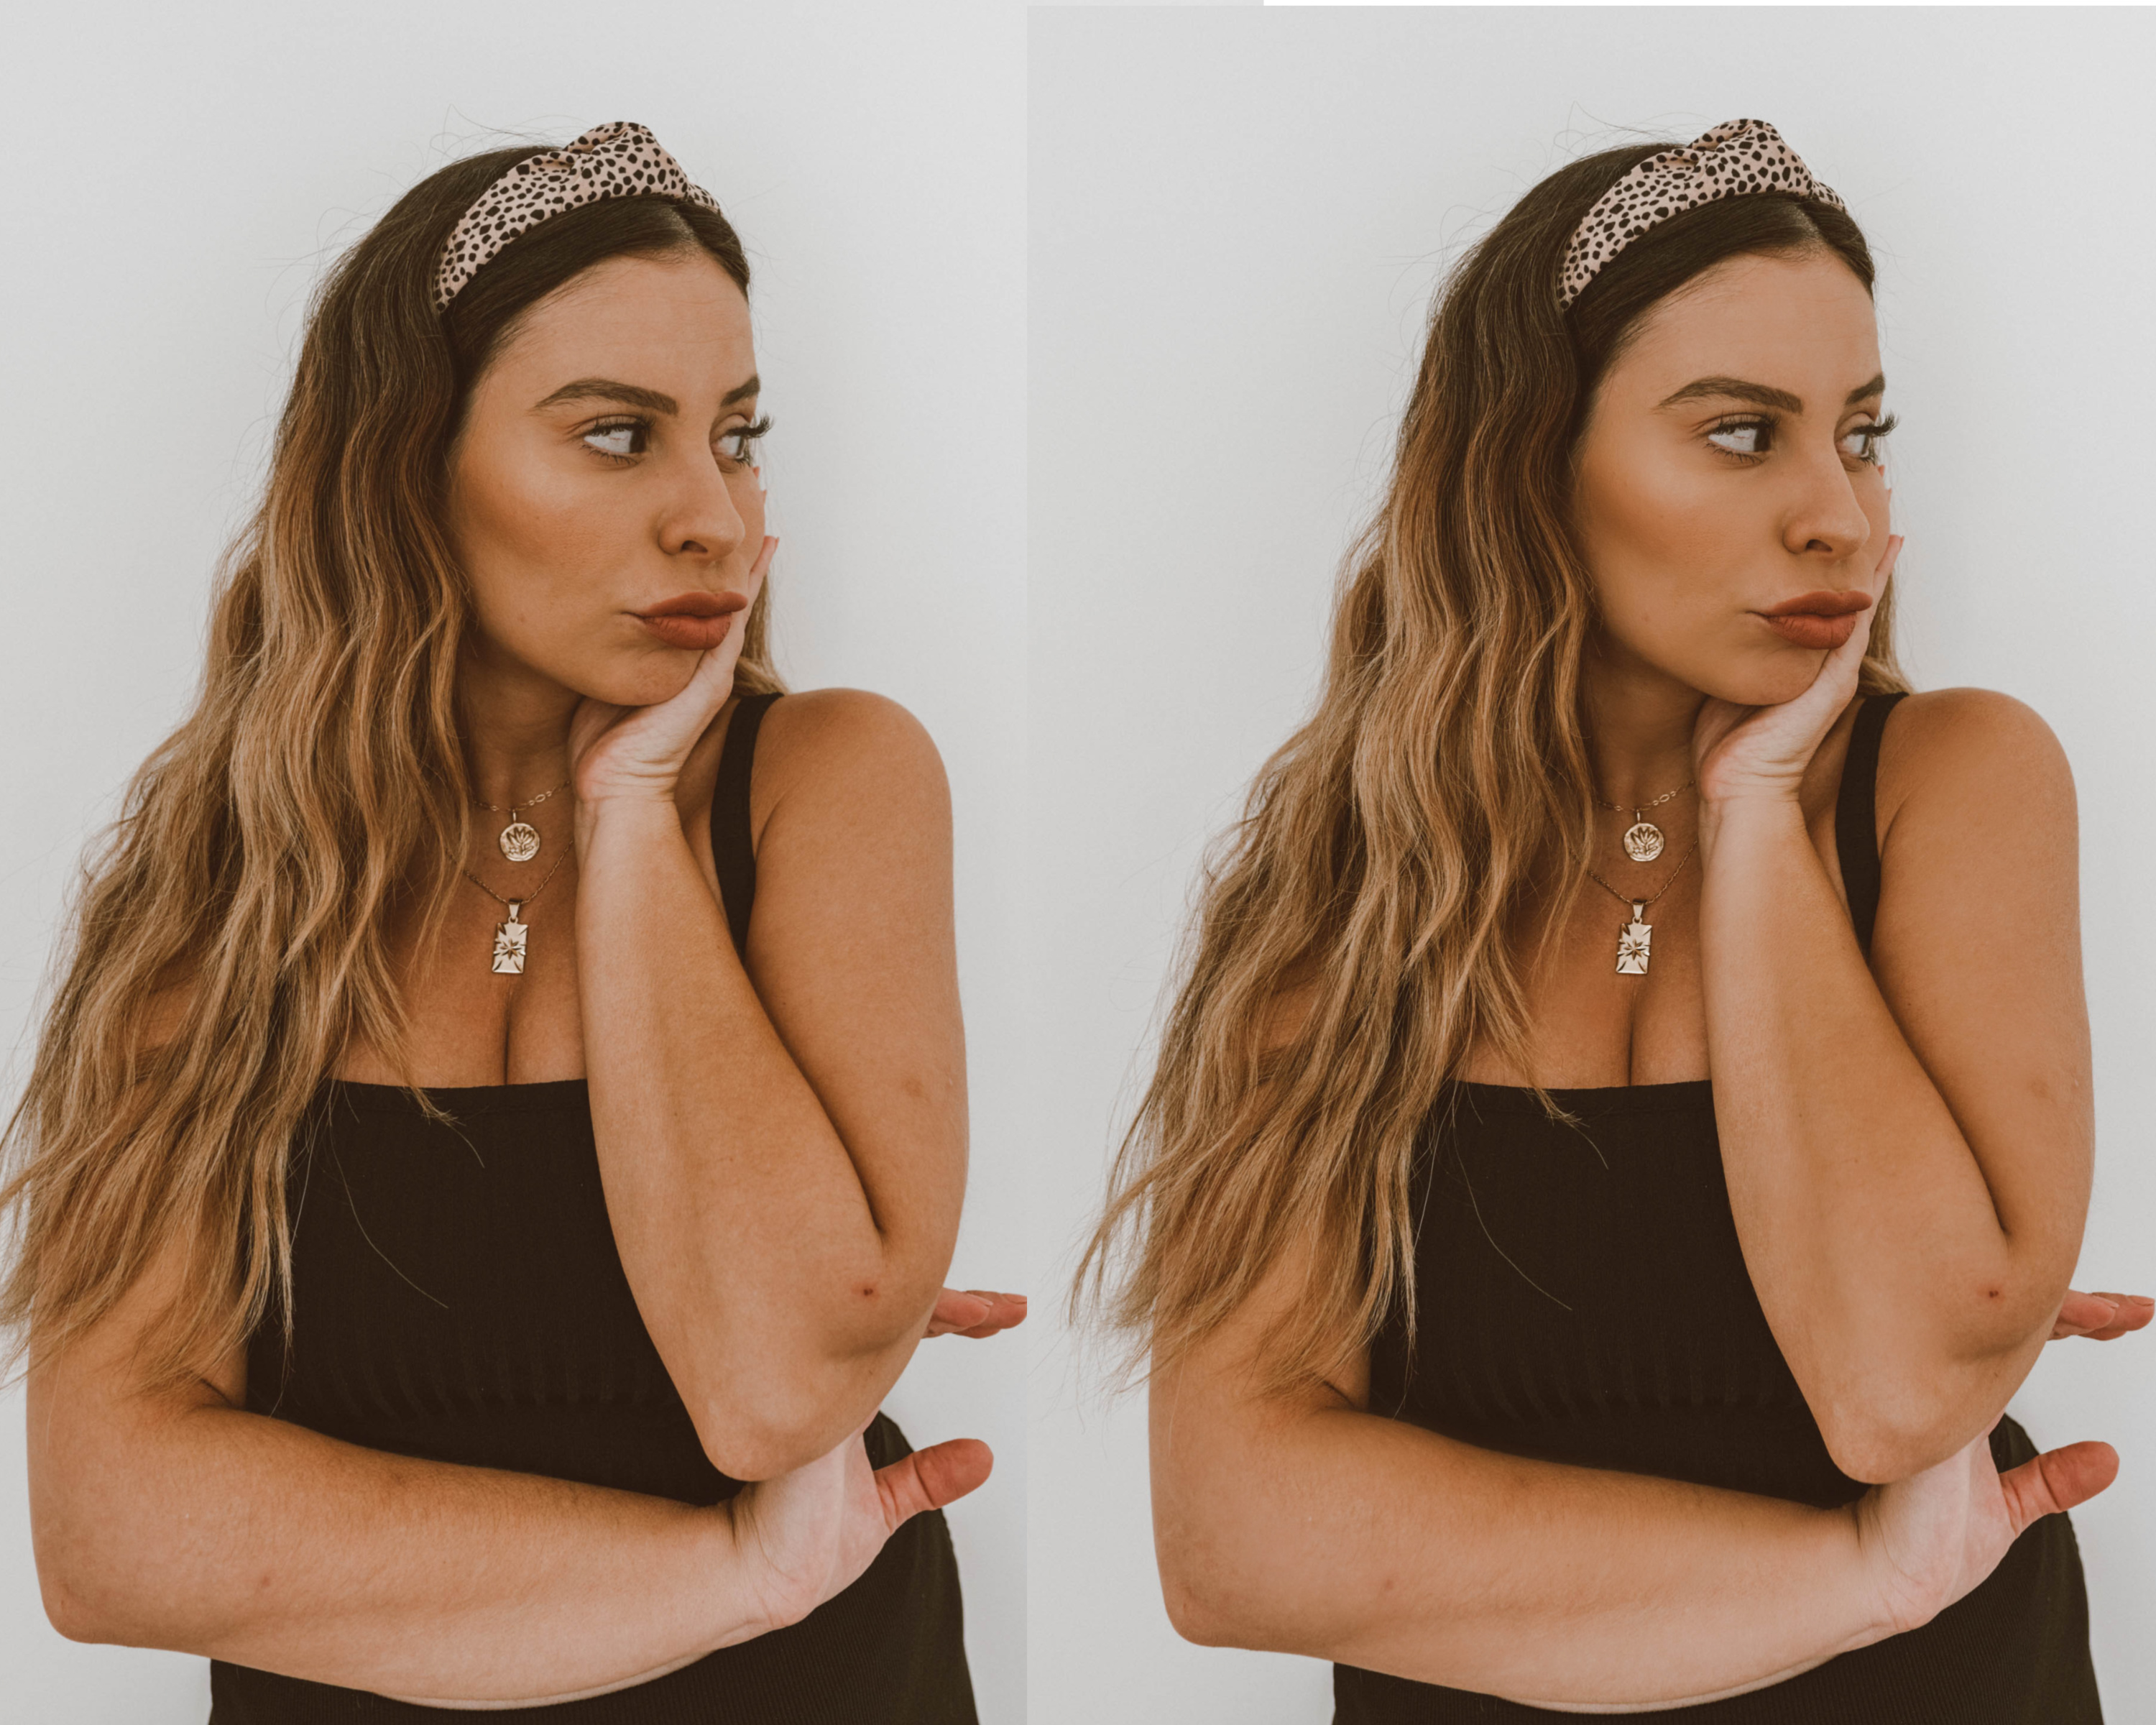
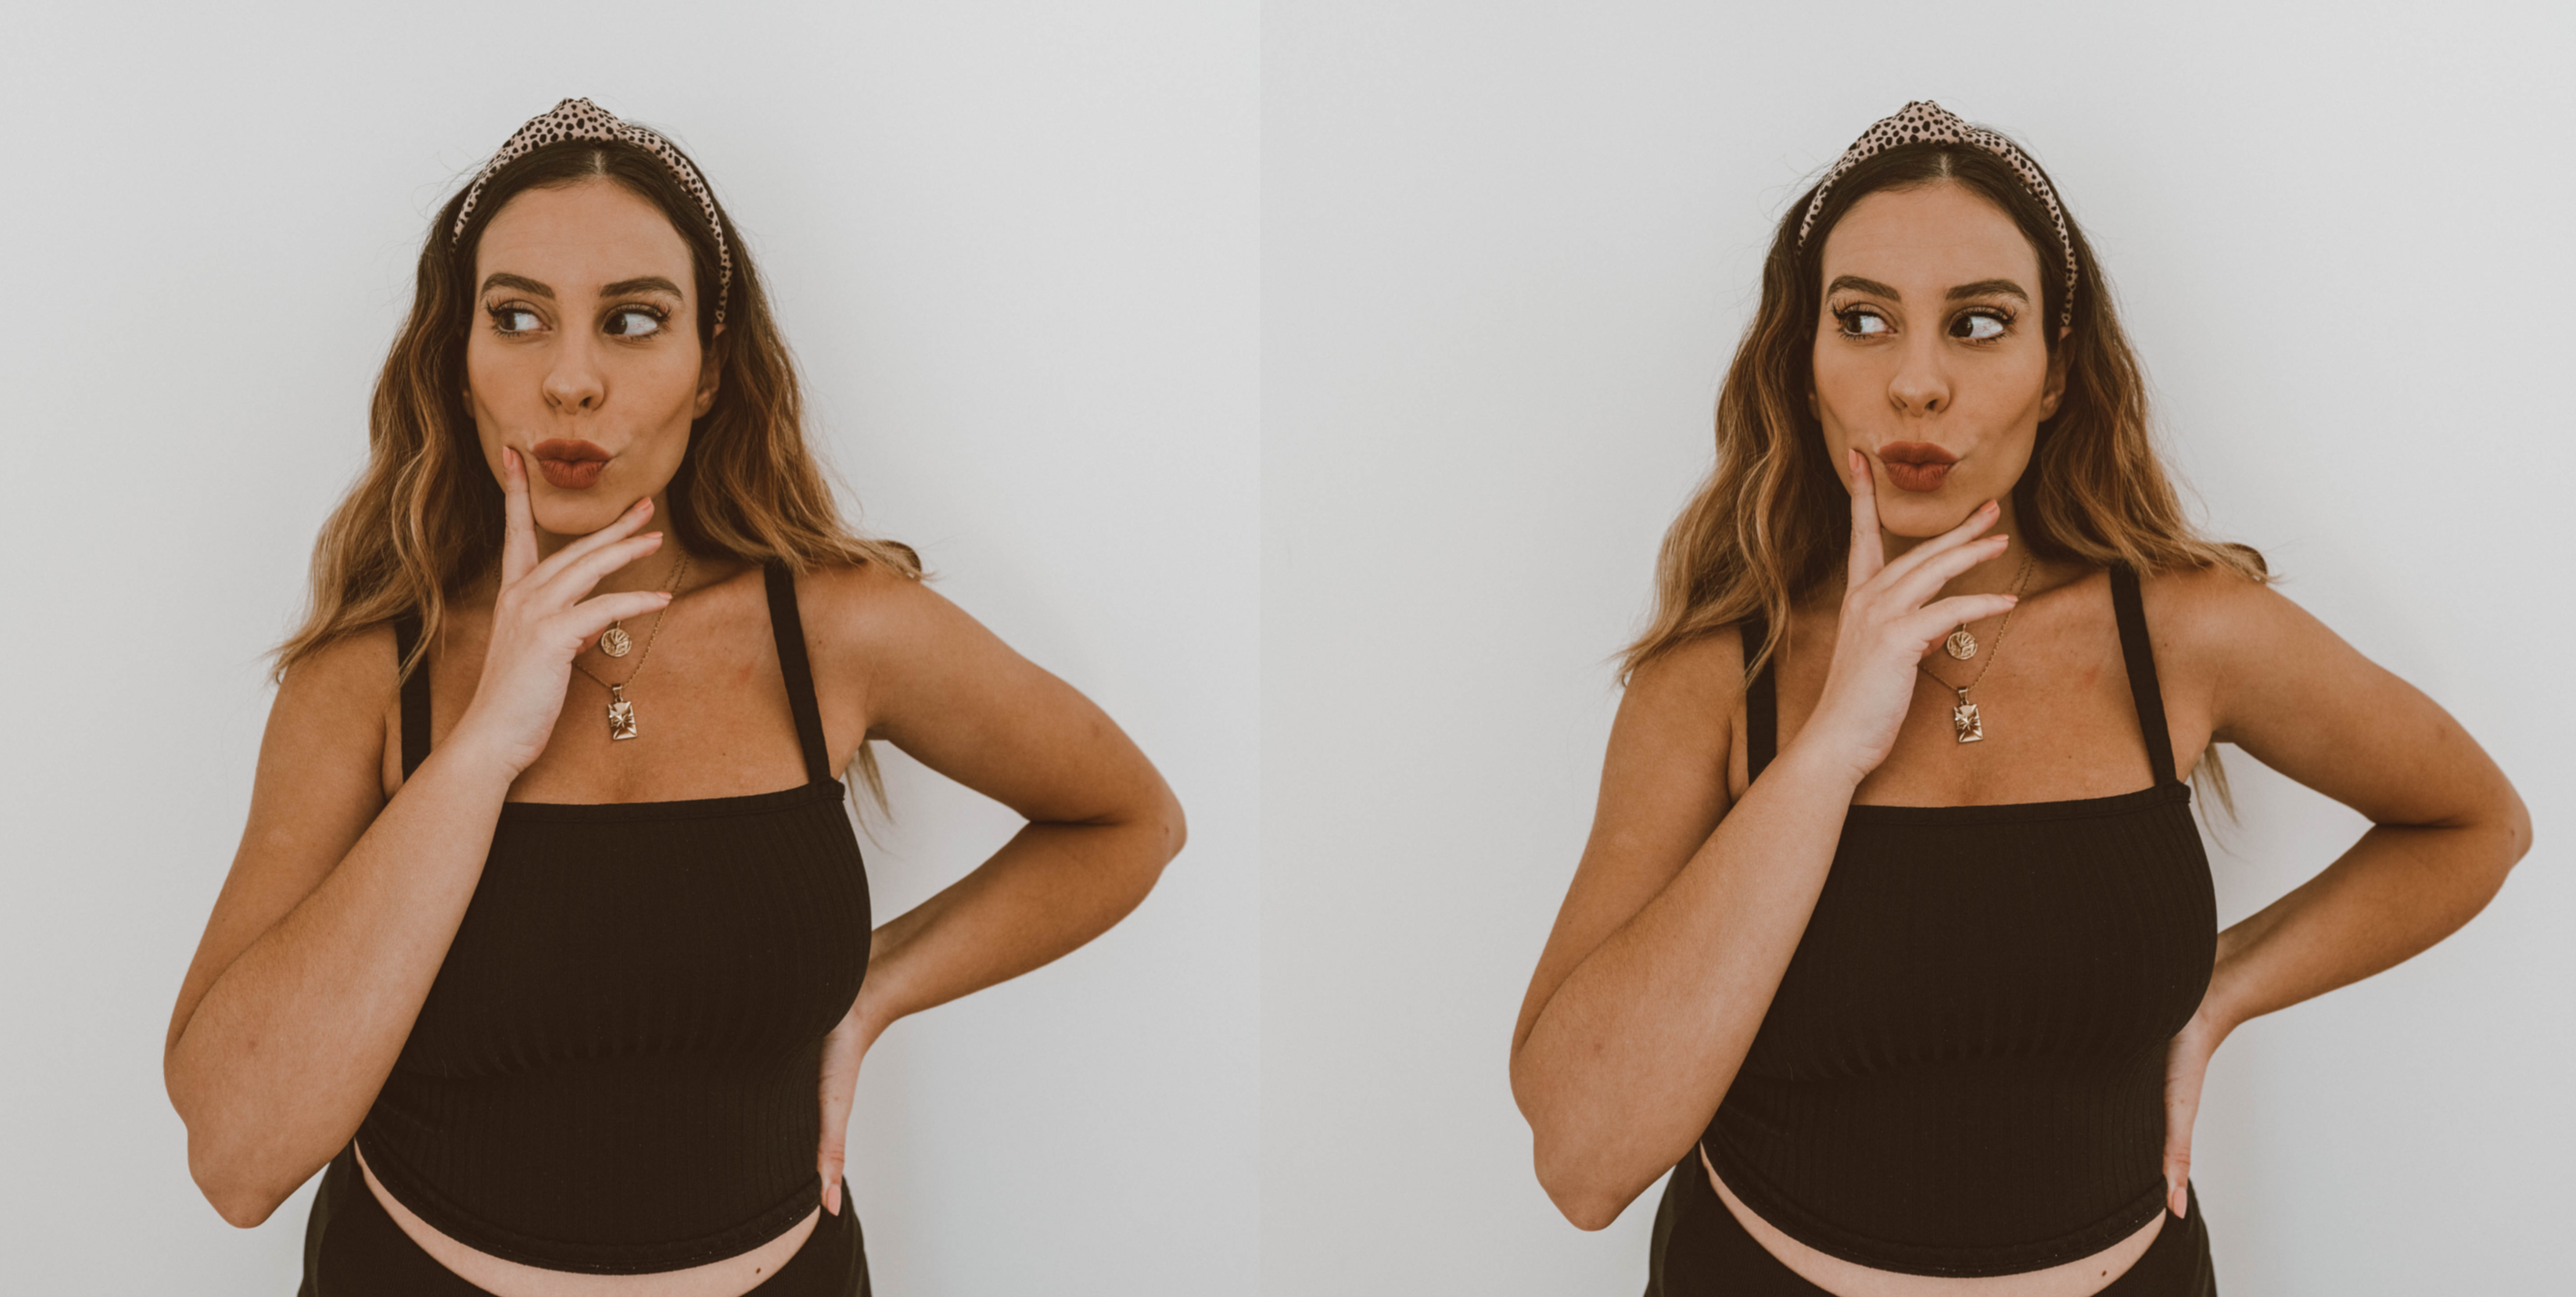
-Airbrush: to smooth out my skin, especially when I’m posting close up shots! Their airbrush tool is the best I’ve used because you have SUPER control over how smooth or how natural you want it to look. I applied it to the photo on the right, as you can tell it looks smooth but not overly fake.
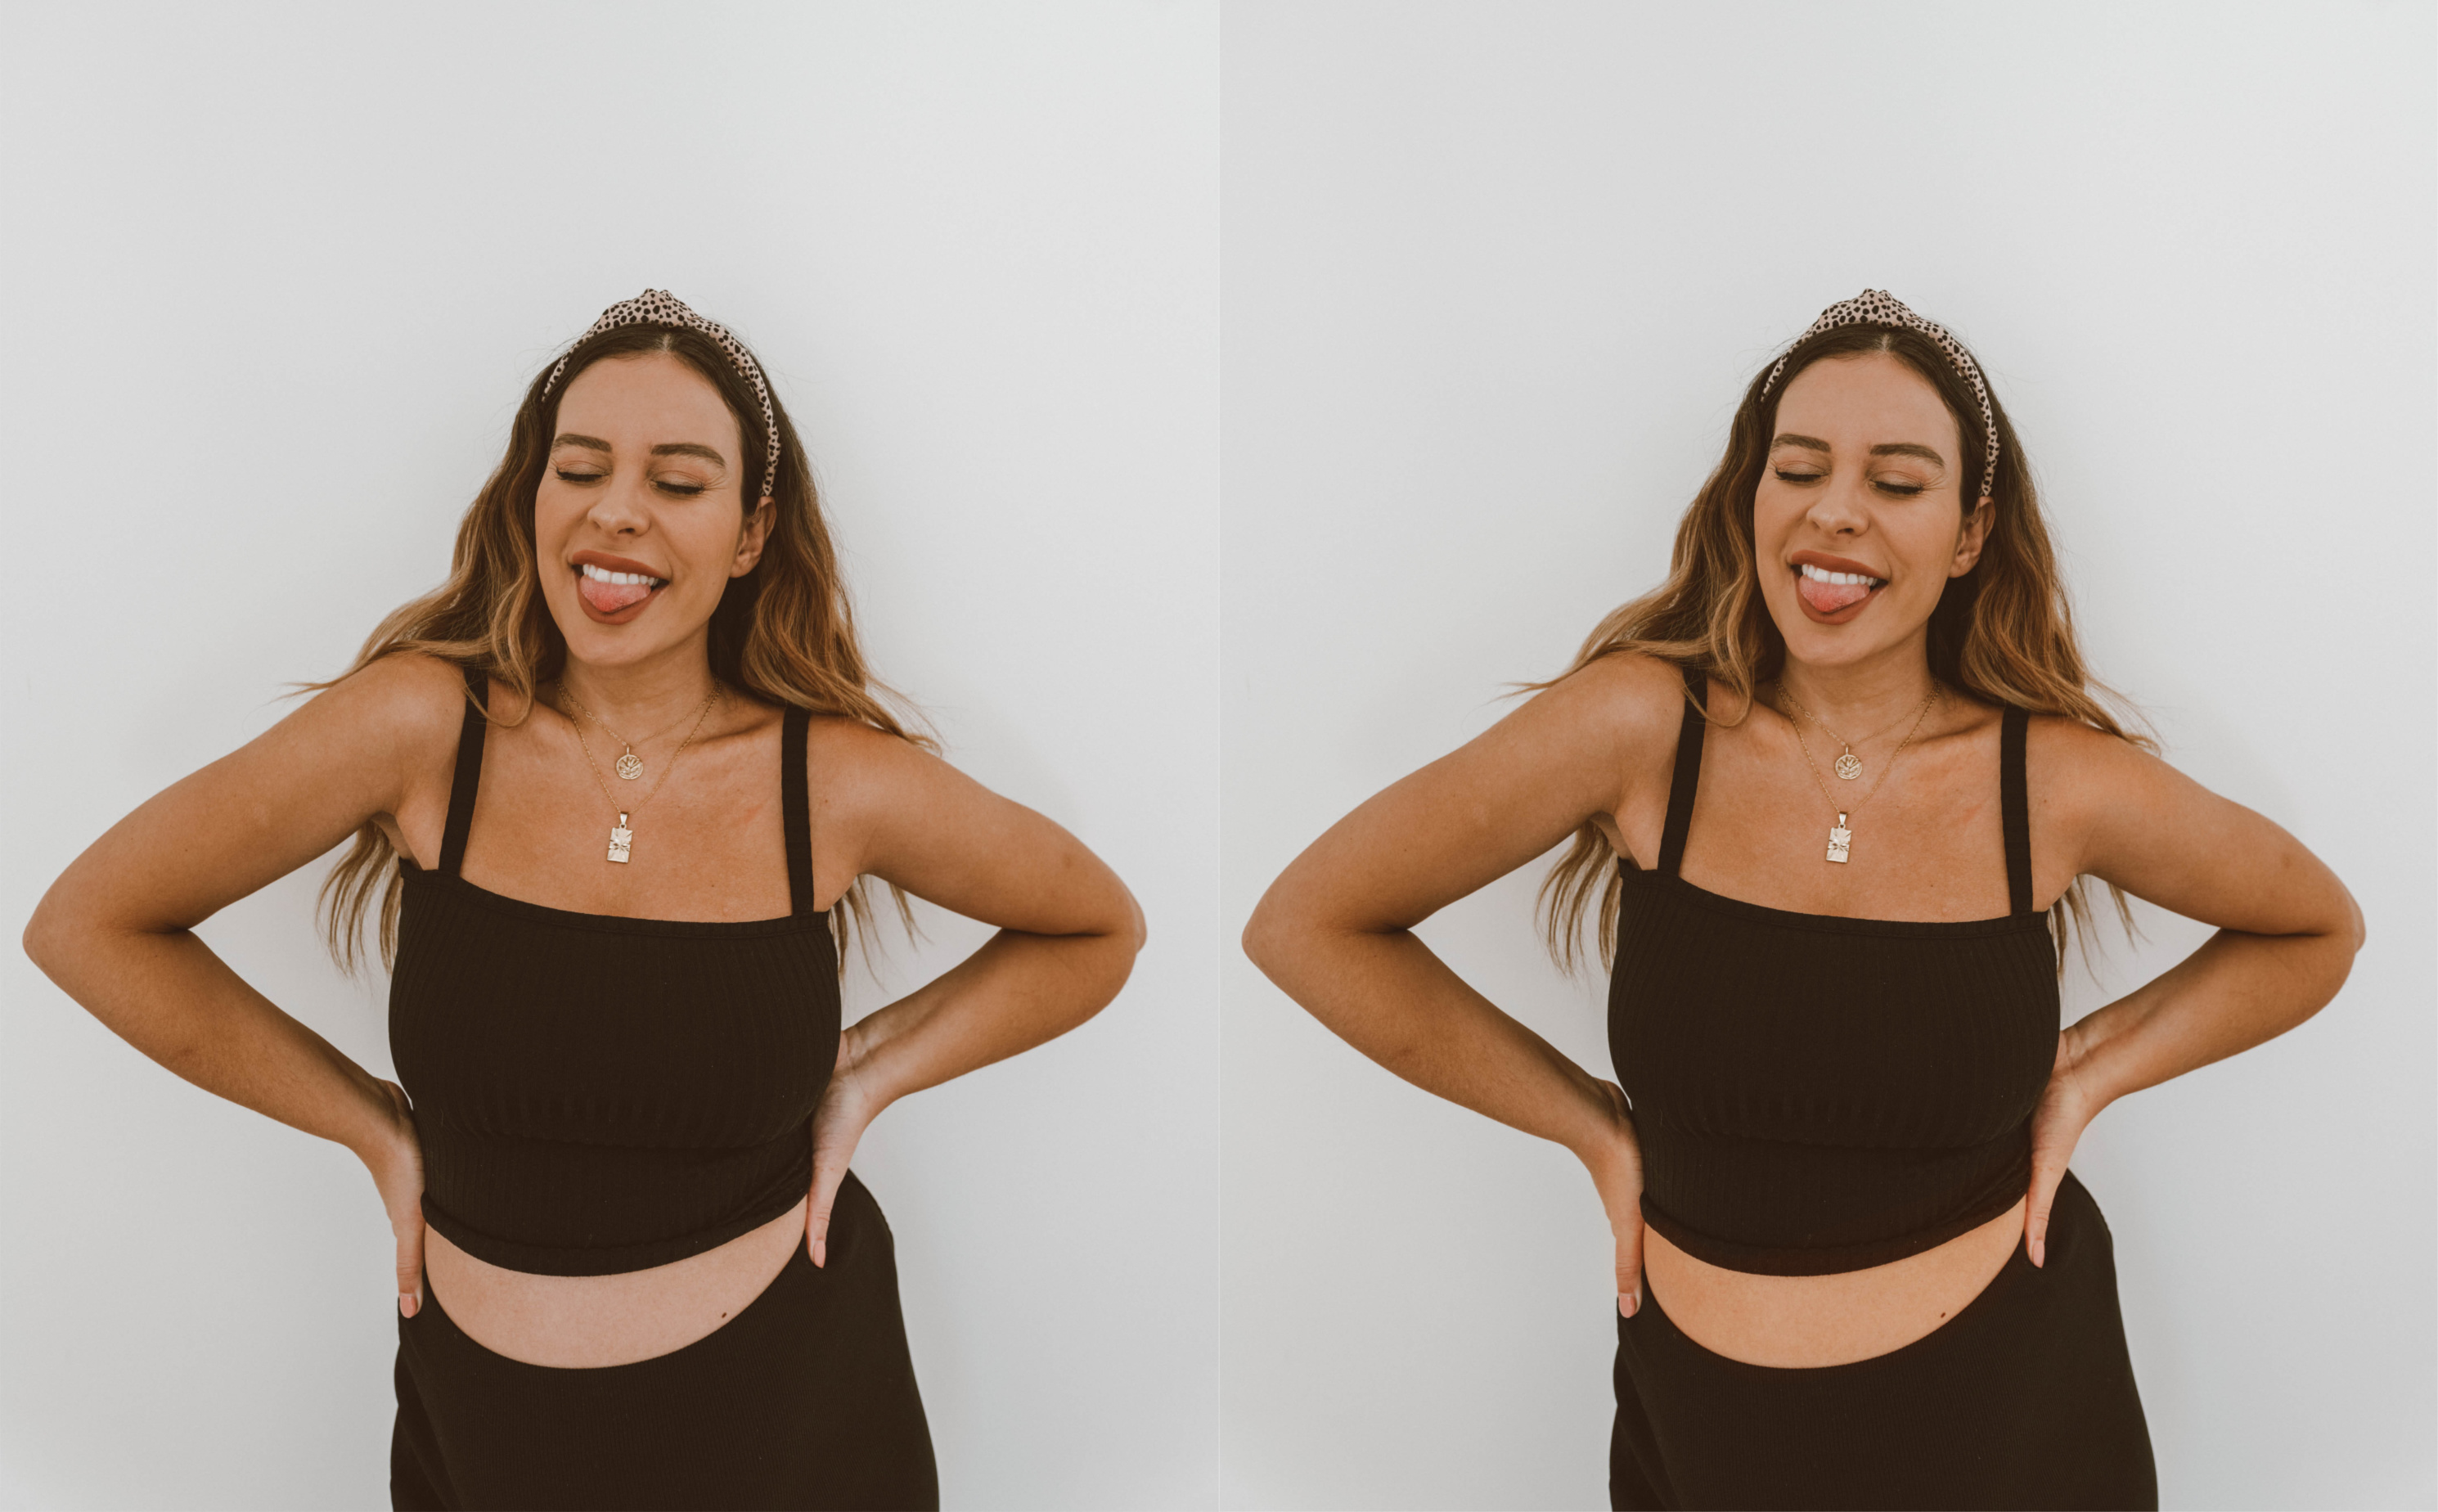
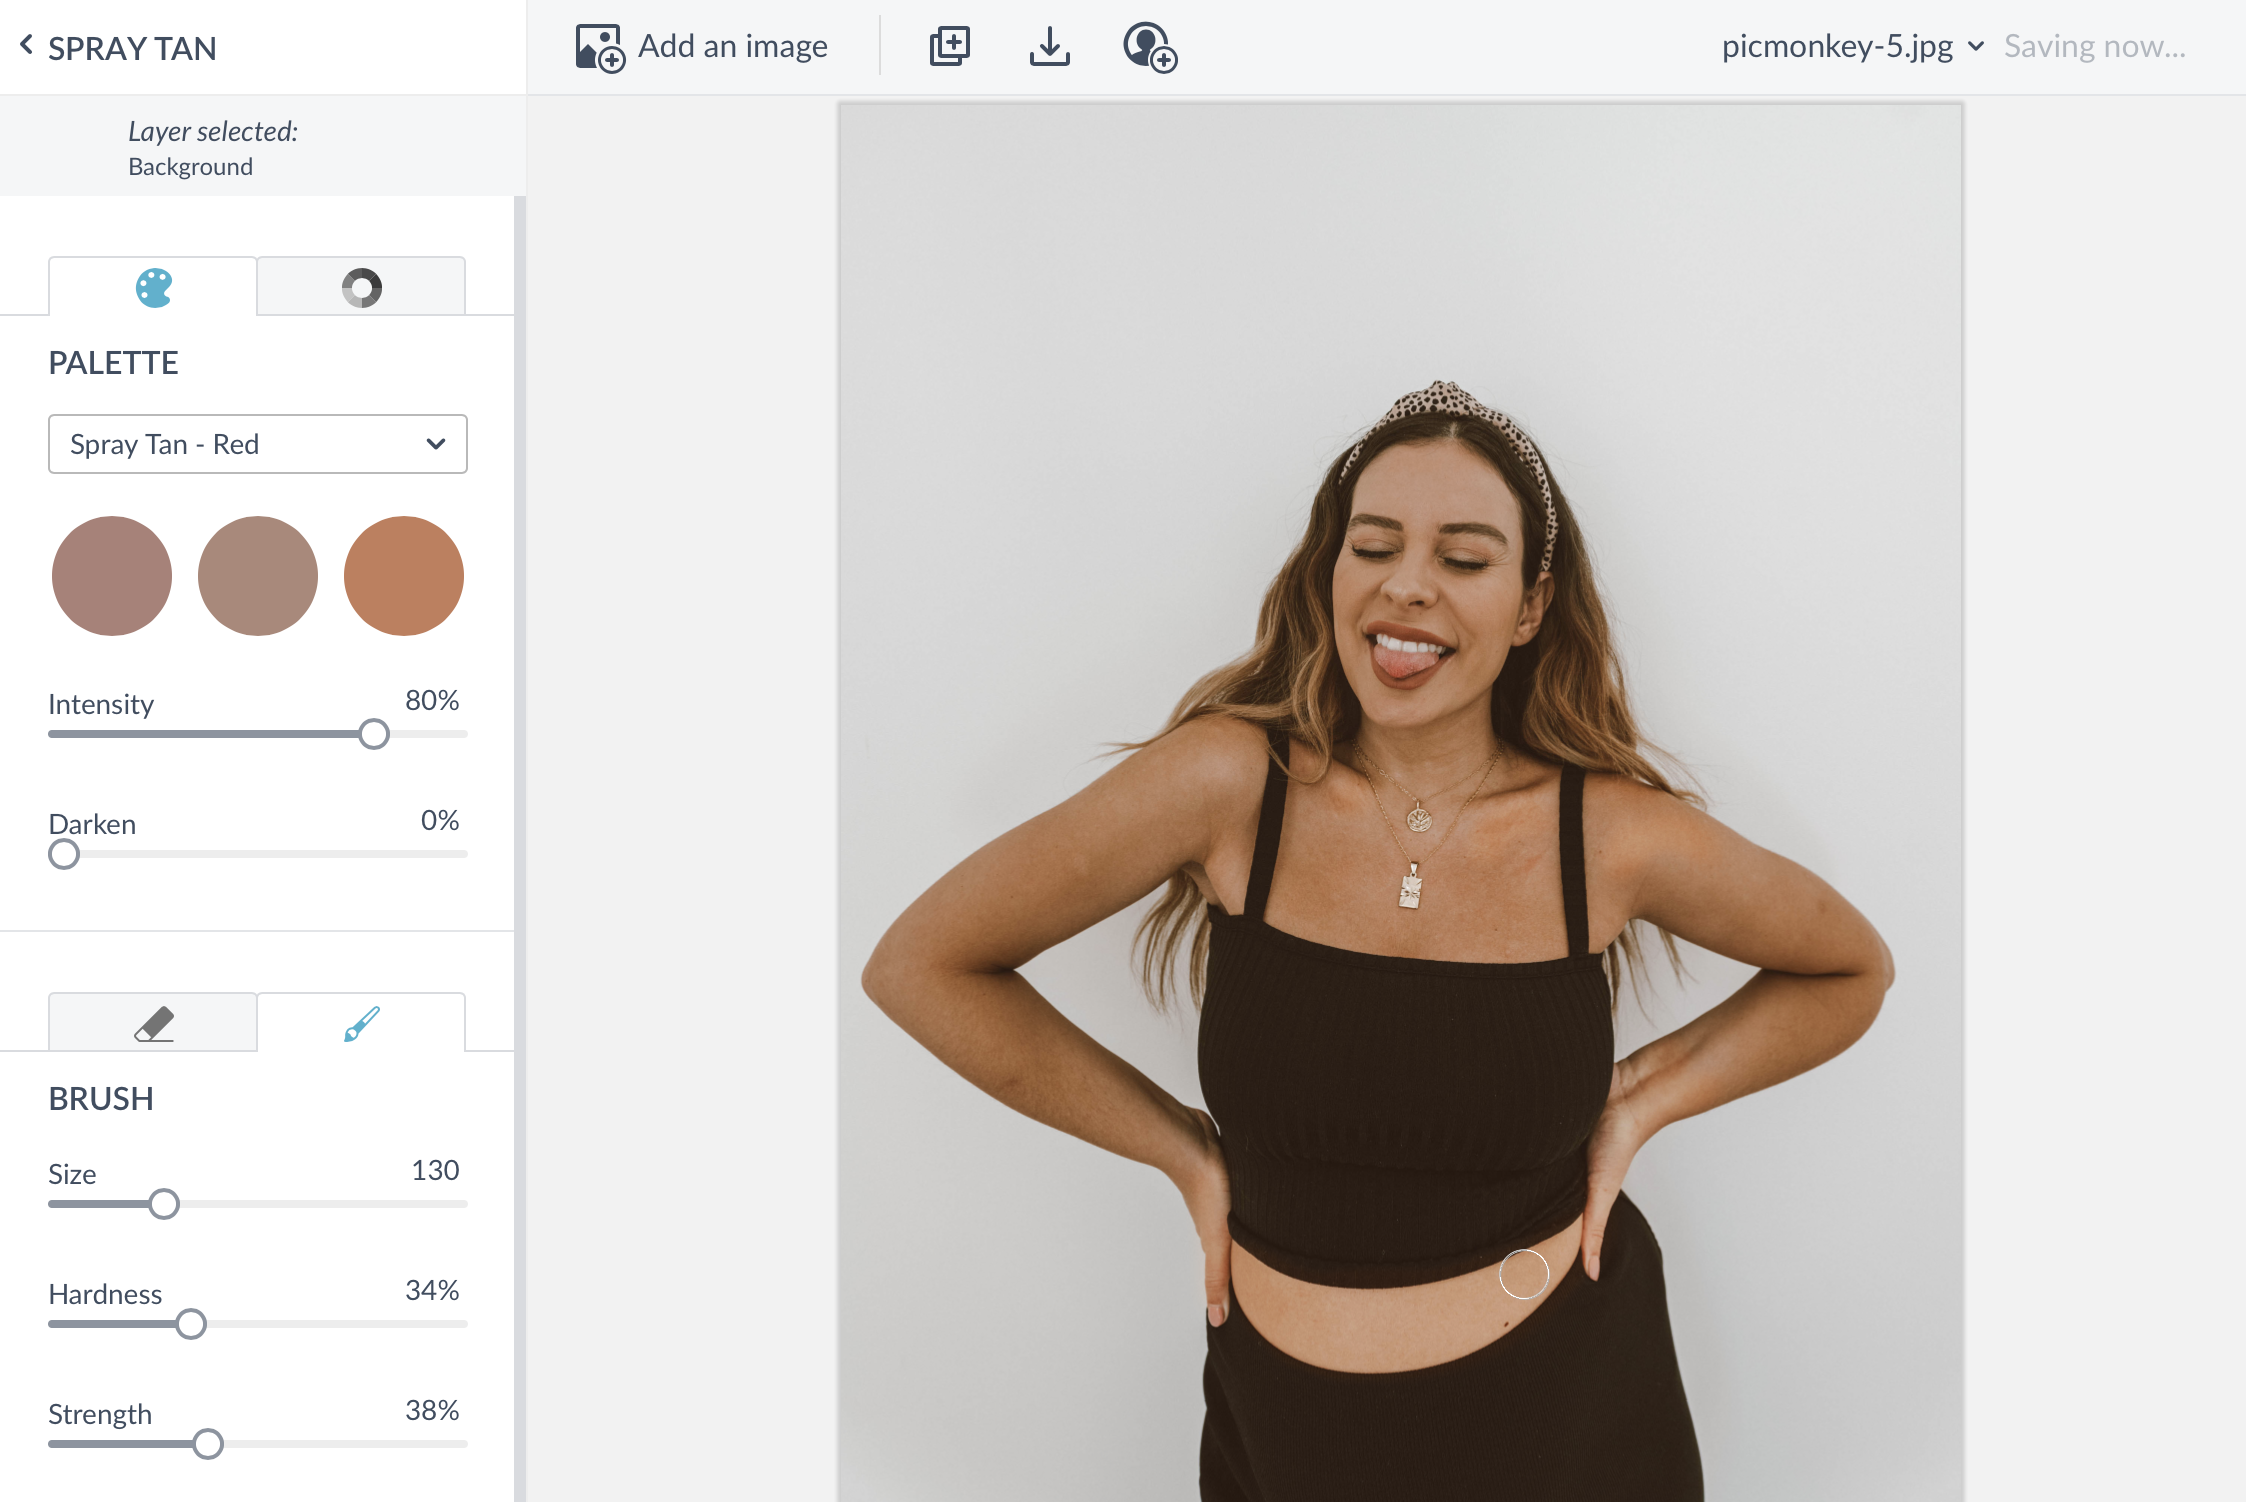
-Spray Tan: to match my skin tone overall. This is a new tool I use and one I particularly love because my actual spray tan comes off patchy in photos. Notice how white my tummy is in the photo on the left and on the right…wahla…my midriff matches the rest of my body!
-Eye Brighten: my NUMBER 1 touch up to really make my photos pop. What does eye brighten do? Well it defines your eyes. It makes the whites whiter and the blacks/outline darker. It’s important to instantly capture your audience with a photo and I think having prominent eyes does that!
I highly, highly recommend checking out PicMonkey! They offer a 7 day free trial PLUS I have a discount for you guys! Get $20 off a full year of PicMonkey by using this link: https://www.picmonkey.com/blog/emilyv


I have never tried PicMonkey, thank you for sharing the post.